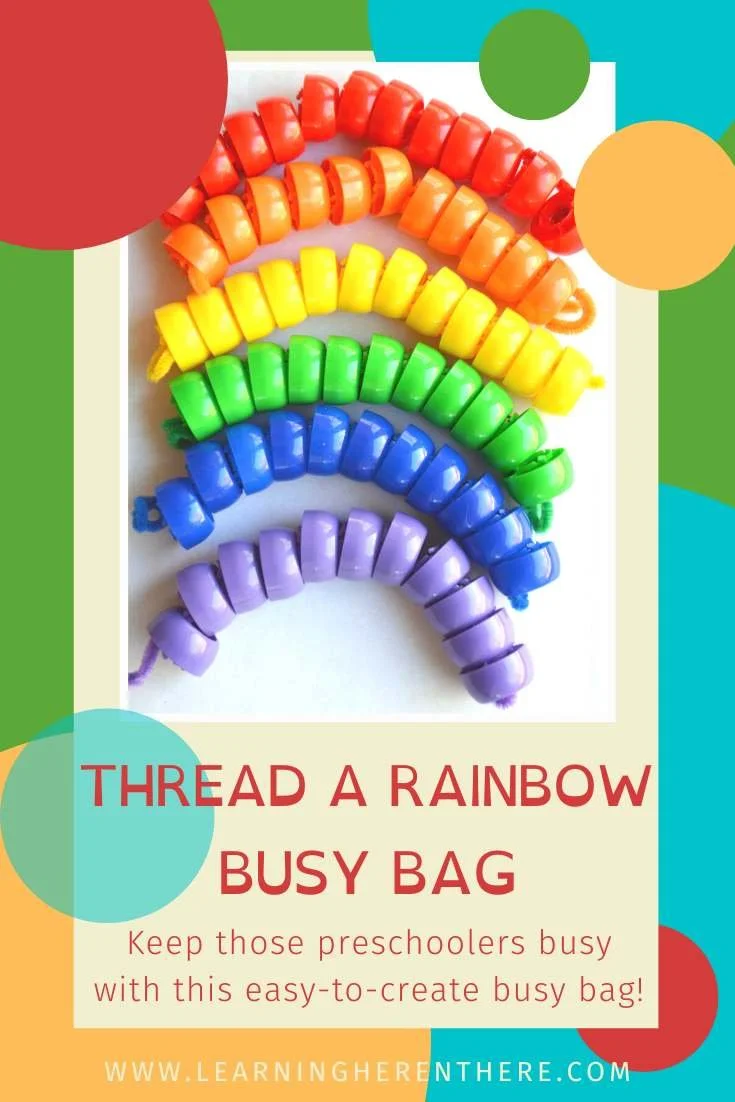
Thread a Rainbow Busy Bag

Busy Bags have been a big hit in our house. I love how they promote long sessions of fun and focused independent play. The great thing about busy bags, is that once you show the child how to use the materials inside the bag, they’ll know what to do the next time they’re presented with those materials. Toddlers and preschoolers love feeling independent, and busy bags allow them to accomplish something all on their own. I’m always impressed with how many times a child will play with the same activity before getting bored with it.
Eventually we rotate to a different busy bag, even one that’s been played with before. It’s exciting all over again.
If you like using busy bags to promote independent play, check out ours:
Or follow my Busy Bag board on Pinterest to get more ideas.
And now for more on our Thread a Rainbow Busy Bag.

I don't know about you, but we have accumulated quite a collection of fruit puree pouch caps over the last few years. They're fun to play and learn with. Recently, we used the plastic caps to thread a rainbow and it became a busy bag activity that I think other toddlers and preschoolers would enjoy. If you collect these caps, then this activity should be quick and easy to put together.
Supplies you'll need:
Plastic caps (or beads) in the colors of the rainbow (10-12 of each color)
Fuzzy sticks (one for each color of the rainbow)
Colored construction paper (one piece for each color of the rainbow)
Large resealable plastic bag (if making this into a busy bag activity)
Once all your supplies are assembled, the activity can begin. The first step is for the child to sort the different colored caps onto the matching pieces of construction paper. (We used half a sheet for each color.)

Once all the caps are sorted by color, the child is ready for the fuzzy sticks.

Be sure to twist up one end of each fuzzy stick so the caps won't fall off as new ones are being threaded on.

The next step is for the child to thread the plastic caps onto their matching fuzzy stick, and then twist up the end of the stick so the caps don't fall off. All that's left after that, is to line them up with the colors in the order of the rainbow.
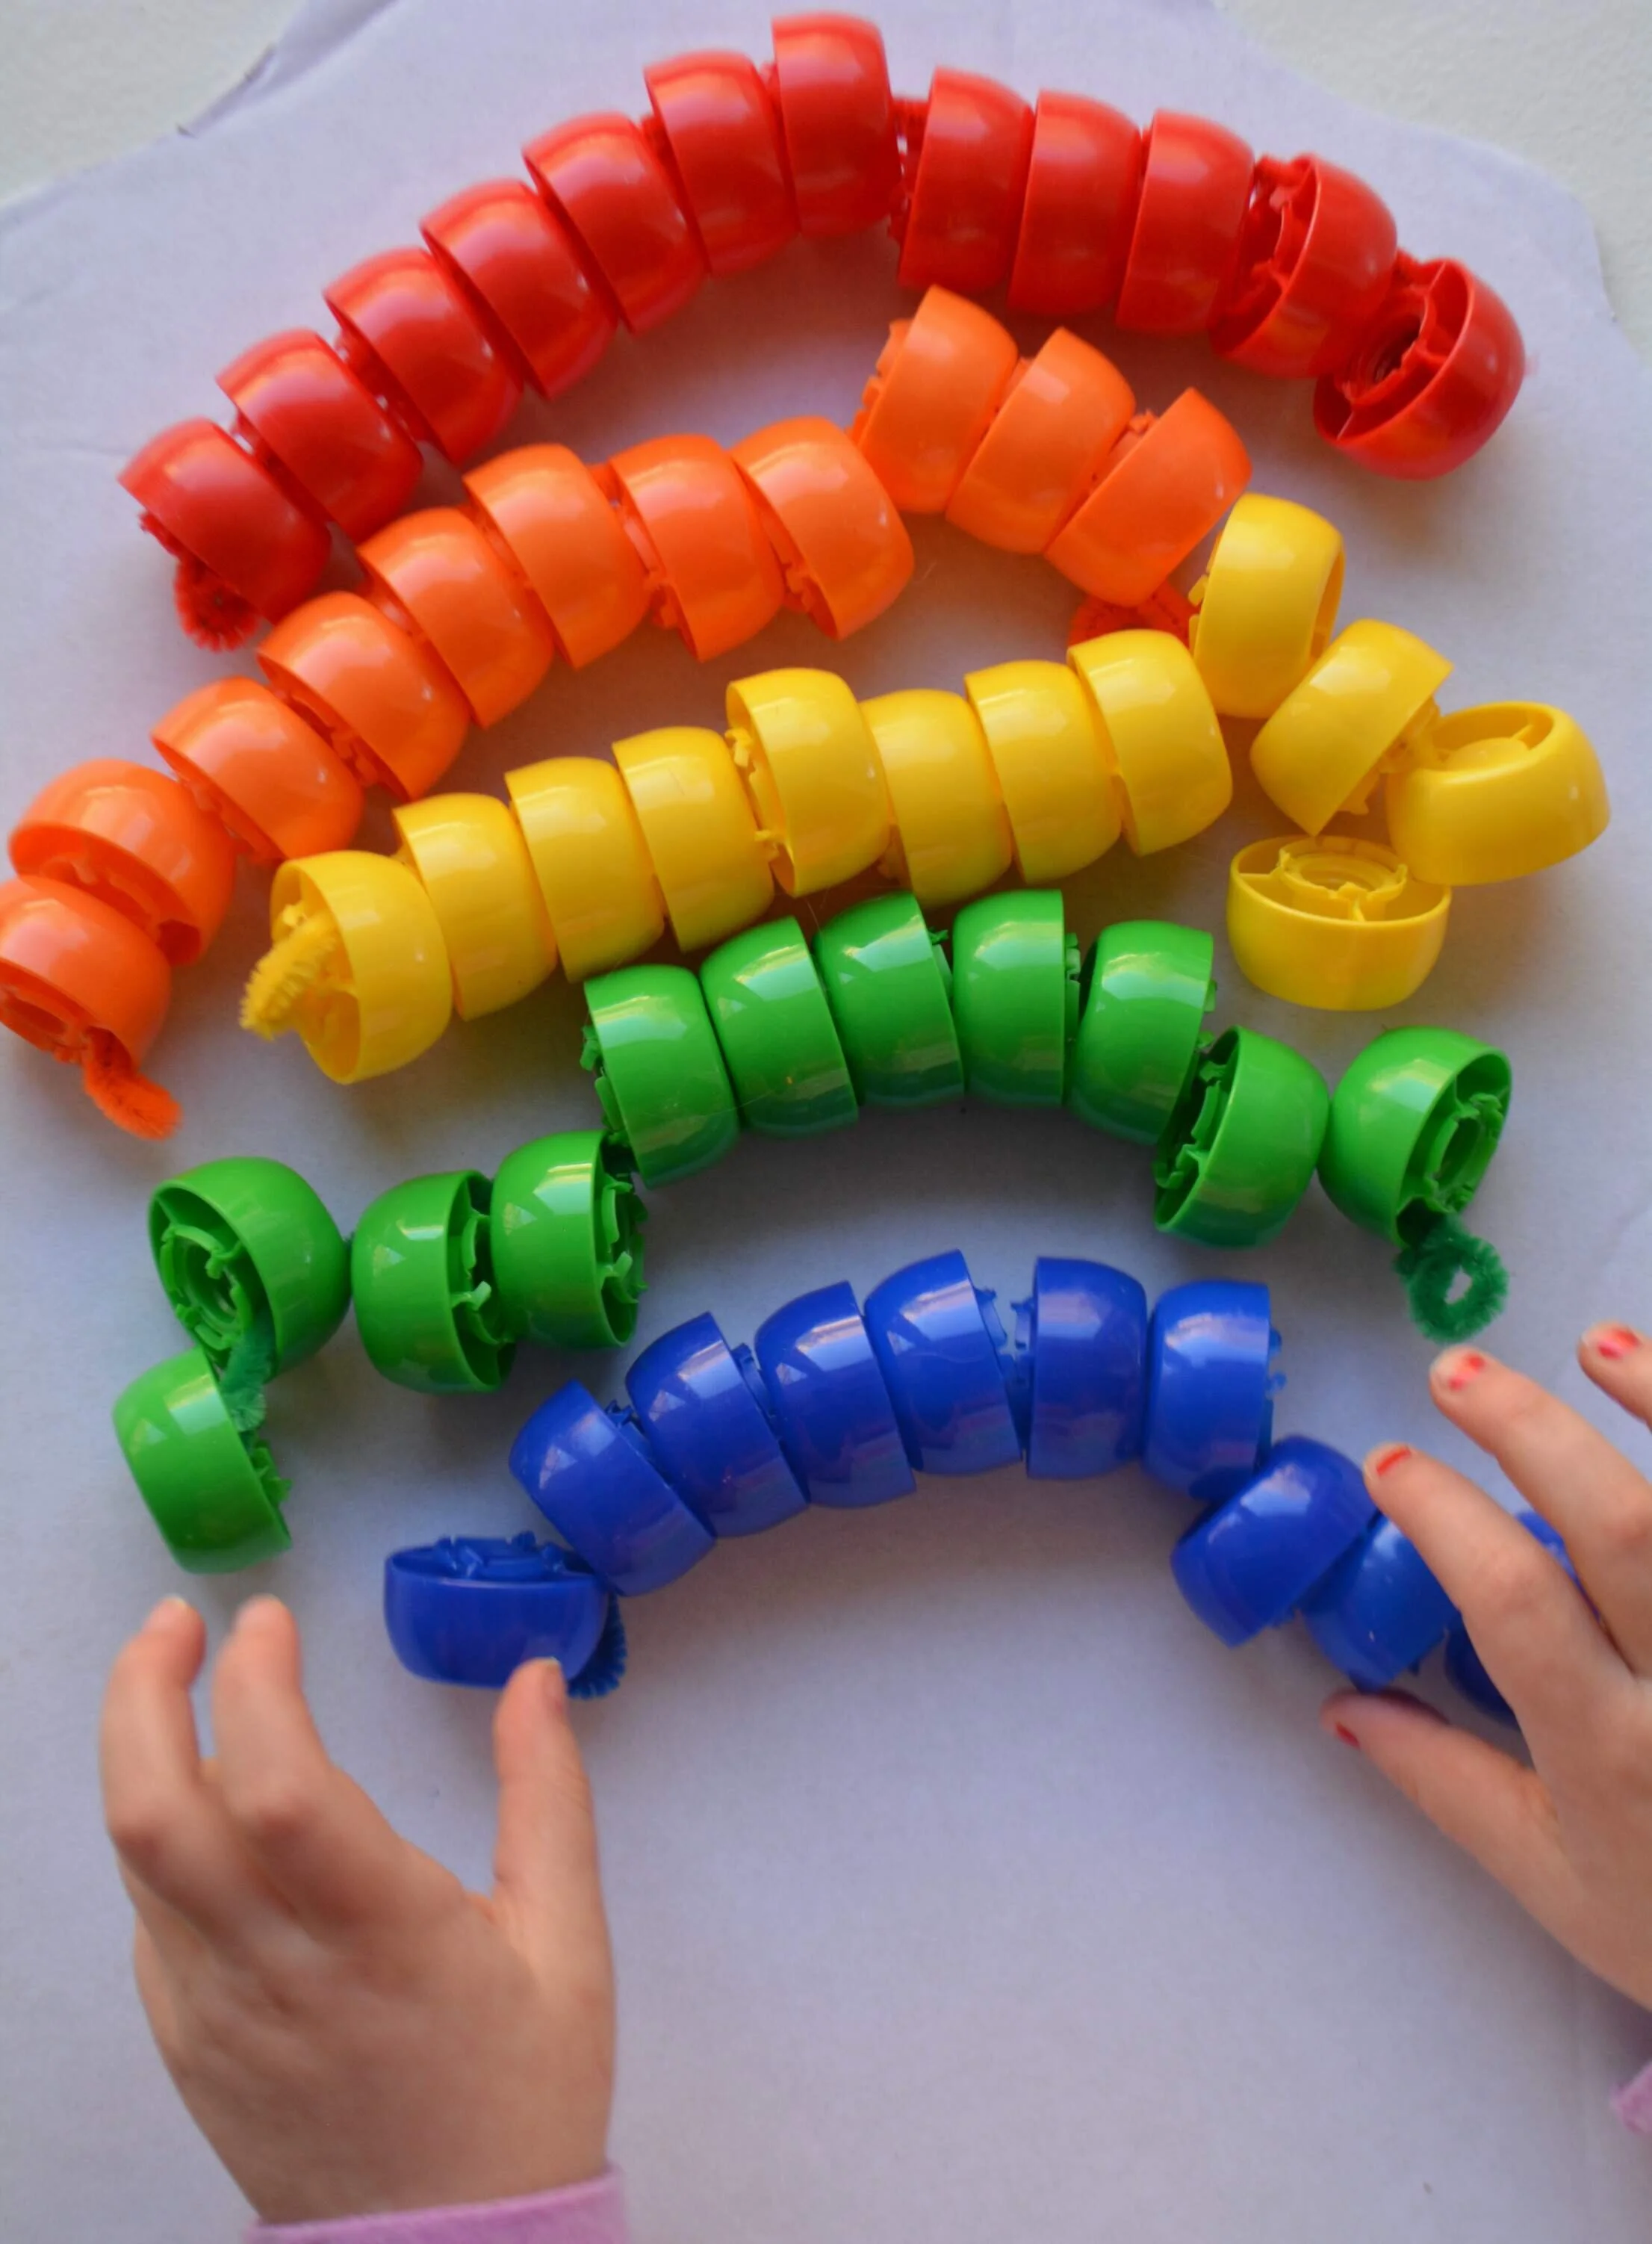
And voilá! You've made a plastic cap rainbow!
Note: To make a rainbow where the top colors arc over the bottom colors, you would need to use longer fuzzy sticks (two tied together). I decided not to do that because I was afraid my daughter would lose interest in the activity if she had to thread that many caps of one color.
For other rainbow kids crafts, check out our Rainbow Ice Sensory Sink or follow my Rainbow Study board on Pinterest.
I would greatly appreciate it if you shared this post by pinning the image below. Thanks!
You may also like:

Toys that wear out kids
Apple preschool activities
Stay sane when home with kids